Blog
Home
Pay the Piper.
Having a lot of time in hand does make you snoop around. I hate doing leg work and therefore I am snooping around discovering new domains, exploring the long postponed arenas and getting happiness from it. As a part of this I wanted to explore a little bit in web development.
I was always fascinated by people embedding a game in their website and inviting people to play. For example games like Snake.io make me envy the creators as to how they could do this when I couldn’t. So out of this envy I too wanted to create an online multiplayer game. Which game to choose? If I choose DoTA or CS, I will be spending my entire life time creating sprites for it. Therefore I need a simple game that has minimal logic. Automatically my mind landed on Snakes and Ladders.
I don’t think there are any tutorials explaining each and every step and I had to figure out everything on-the-fly. So, I wanted to write the steps I followed, difficulties I endured as a part of this little journey. I will also put some code so that beginners won’t have to deal with absurd syntaxes.
History of everything - What to do, What not to do.
When I started I don’t know anything about Web development nor do I know. However I have a working knowledge with HTML and Javascript. Actually my first idea was to write a game using HTML5 and Javascript. So, I naively assumed that these two will be enough to write a multiplayer game. It took me 2 days to complete the entire code and I was able to open upto 6 tabs using localhost and play the game. Each tab has its independent Javascript and all the position is maintained by a shared memory. I was happy for a moment. But then I thought how would this setup sustain if we are running on multiple machines. Thats when it struck me. All the work I have done is worthless.:(
Anyways, I started googling for a while and found that there is a way we
can achieve commuication between two separate machines using NodeJS.
There are two interdependent web frameworks called ExpressJS and
Sockets.io which can help achieve what I need. I found that these two
work by Message Passing technique which we will see below.
With that said, I will jump into the tutorial right away. You can find the complete source code here.
Requirements
Before going into installing the required components lets see why we are using them. ### NodeJS NodeJS is a open source, cross platform server side runtime environment. It provides event driven architecture with non-block IO model that makes it light weight and efficient. Due to this asynchronous event driven runtime we can build efficient, real-time and scalable applications using Nodejs. We won’t be explicitly using this but we will be internally calling its functions from ExpressJS and Socket.io as they both are nodejs frameworks.
ExpressJS
Express is a minimal and flexible Node.js web application framework that provides a robust set of features for web and mobile applications.
Socket.io
Socket.io is a Javascript library for web applications. It enables realtime bi-directional communication between a nodejs server and the client which is browser. It has two API one which runs on the server and the other one runs on your client.
Installations
I am assuming that you are working on a Linux desktop environment. For
others with Windows and Mac code will be same however installation
methods may/maynot differ. First we will begin by installing nodejs
and npm
sudo apt-get update
sudo apt-get install nodejs
sudo apt-get install npm
npm can be said as nodejs package manager. It helps us in installing
packages into the application makes building it on the server easy.
Start the project
First, create a folder and navigate into it. Once you are in it. Run the
command npm init. It will ask for your details and some configurations
for the app. Fill the details you think are necessary and neglect the
remaining. Once you finish this you will have a package.json file inside
your project root folder. Change entry point in the options to app.js.
Refer to the image below.
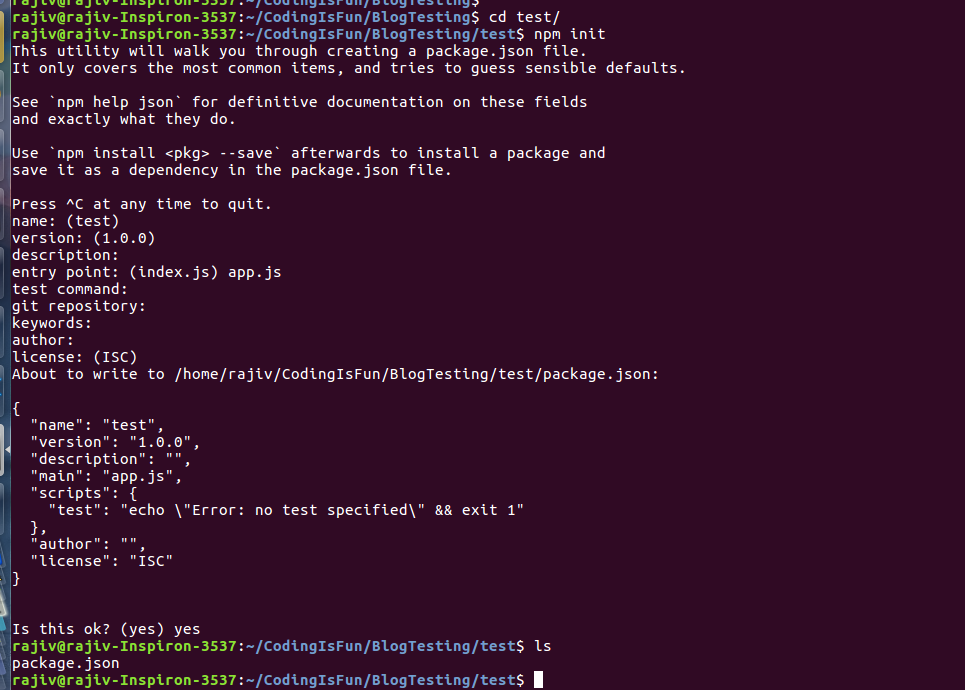
After this you can see a package.json file in the root folder. Now we need to install ExpressJS, http for mimicking a server,socket.io,path to access the directories. Execute the following commands in your root folder.
npm install --save express
npm install http
npm install socket.io
npm install path
Before jumping into the code, lets see the directory structure our
project should be and what the significance of each file. You can do so
by installing the tree package in ubuntu and running it in the root
directory. Below is the directory structure I have.
.
├── app.js
├── index.html
├── package.json
└── public/
- app.js is the server side code. Infact this script acts as a virtual server by accepting and processing the client connections.
- index.html is your client side script. It contains ExpressJS code and Socket.io code for communications and manipulation of the web page.
- package.json is to maintain the configurations and will make the building of our project easier finally.
- public is the folder which contains all the external resources like images, files etc.., that you might use during runtime.
Getting Started
Aah! Finally, we are done with the installations. Finally we can write some code.
First create a file named app.js and put the following into it.
var express = require('express') ;
var app = require('express')() ;
var http = require('http').Server(app) ;
var io = require('socket.io')(http) ;
var path = require('path') ;

app.use(express.static(path.join(__dirname, 'public')));

app.get('/', function(req,res){
    res.sendfile('index.html') ;
});

io.on('connection',function(socket){
    console.log("A new user got connected!") ;

  socket.on('disconnect',function(){
        console.log("User got disconnected!") ;
    });
});
http.listen(3000,function(){
    console.log("Listening to connections on *:3000") ;
});
Ok, thats a lot of code to process for beginners. But once it starts to
make sense it is easy to understand. First 5 lines is just like
#includes in C, C++. http acts as a server to the app. io variable
looks after all the connections.
First of all our app to function as a server it needs a listener on a port to accept connections. The below piece of code achieves the same. It listens to port: 3000 continuously.
http.listen(3000,function(){
    console.log("Listening to connections on *:3000") ;
});
The below piece of code tells about the path that is queried and the
page that needs to be served. path / means that when we query the
browser with http://your-server-name:port/ it should serve
index.html page to the browser. We can add custom paths as long as we
are serving with an existent file. The file path should be relative to
the project root.
app.get('/', function(req,res){
    res.sendfile('index.html') ;
});
Now that everything is setup we start accepting the connections. The
following code tells us that a connection is established. And it
establishes a socket variable on connection and all the communication
happens through this socket.
io.on('connection',function(socket){
    console.log("A new user got connected!") ;

  socket.on('disconnect',function(){
        console.log("User got disconnected!") ;
    });
});
Now that we have setup the server side. Lets write the client side code.
<!DOCTYPE html>
<html>
<head>
<title>Snakes and Ladders!</title>
<script src="/socket.io/socket.io.js"></script>
<script src="game.js"></script>
</head>
<body>
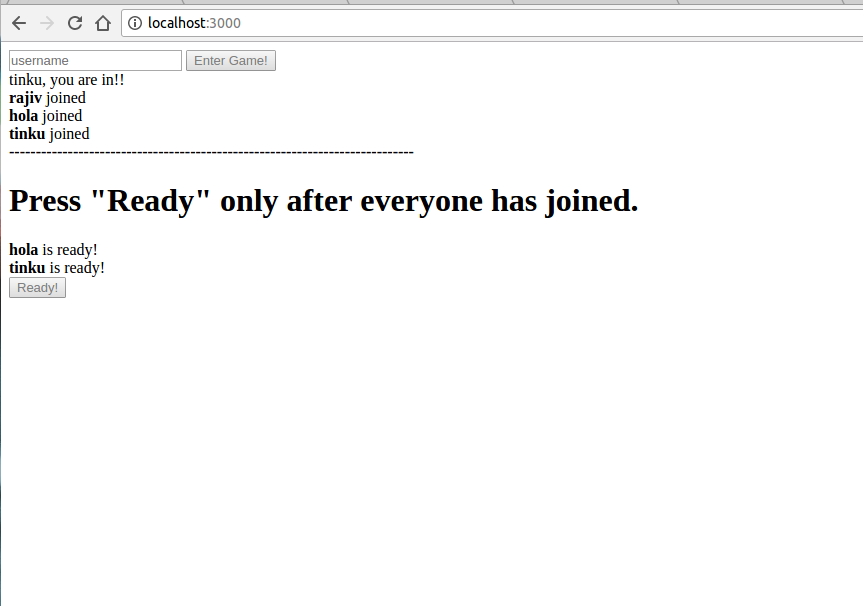
<input type="text" placeholder="username" id="username" class="username">
<button type="button" id="enter" class="button" onclick="addUser()"> Enter Game! </button>
<div id="status" class="status">Status: </div>
<div id="room">Noone yet!</div>
<div><b>----------------------------------------------------------------------------</b></div>
<h1> Press "Ready" only after everyone has joined. </h1>
<div id="usrsrdy">None are ready yet.</div>
</body>
</html>
This is the login screen for the client to add themselves to the game and join the room. Once everyone joins the room the game can start. Once this happens we can change the page to the game arena and define each element and how they work. I will try to be concise and to the point. You can find the code in the link provided above.
Coding the Game
Before going into the logistics of the game we need to know how the communication between the server and client happen and how we can harvest it. For this lets take the example of logging the user and basic communication between him and the user.
So, the user enters his name and clicks Enter Game! button. We now
associate the onclick attribute of this button to the addUser
function in the client code. This function then calls socket.emit
function which will send a message header along with some data. We then
add a receive function for this socket on the server side script i.e..
app.js. Lets code it into the app.
In index.html add this
function addUser(){
    var name = document.getElementById("username") ;
    if (name){
        username = name.value ;
        socket.emit('addUser',{username:document.getElementById("username").value}) ;
    }
}
In socket.emit function above, we can see that addUser is the message id and thats how the server side is going to identify that event. Now we write the server code for receiving as follows.
In app.js add this
socket.on('addUser',function(data){
    var user = data.username ;
    //Add user to a list and consolidate or whatever //
});
We can observe that the function signatures are in such a way that the
data sent by the client is being sent to the receive function in the
server. The data is accessed just the way a json variable is handled
with a dot in the interim. In a similar way the server can send data to
the client and client can write a receiver_handler function for this.
The technique being used is called asynchronous message passing
technique. We use Socket.io for this.
Now that we have learnt about the messaging passing technique between the server and client we will get some insights of how writing a game proceeds. Since we have removed all the “hurdles of no information”, the track ahead of us is smooth and we can eaily skate!
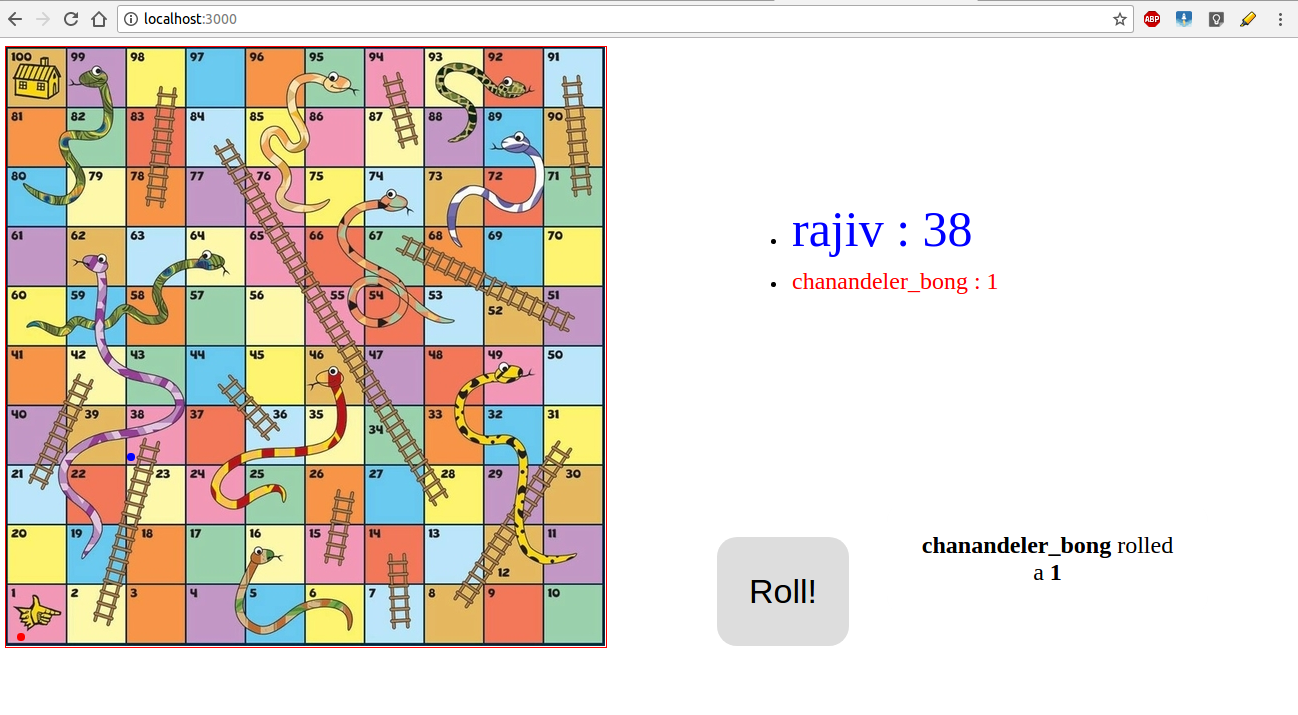
Steps involved
1. Setup the board of Snakes and Ladders with all the ladders and snakes in place and note down the position of each square on the screen so that while making a move you can tell a pawn where to move. Also setup a transparent canvas on the top of the board so that it fits on it and so that we can draw whatever we like on it and it will be like we will be drawing on the board.
2. Now you need to setup protocols for the users to login and
identify themselves and start the game once all the players joined.
3. Maintain variables regarding each player’s position, turn,
moves made and handle the win situation. We can maintain an array to
keep track of the positions of each player and we need to intimate all
the players how much has the current player has rolled and the
transition of the position of that player should be evident on every
players screen. And it should be clear as to whose turn it is now and we
need to display a continuous display of the positions of each player.
And each player should be able to roll the dice only once in their turn
and they should not be allowed to roll the dice and hence it should be
deactivated when it is not their turn. Avoid overflows and put a time
limit for each person to roll.
4. Notify everyone Game over once a win is detected.
Hosting the game on a server
Writing the game is one thing and hosting it on a server is an entirely differnet thing. It will be easier if you own a domain space and a website. But if you don’t have them you have to run it on some third party hosting service. It took me 3 days to find one such service. As of the current time, though I own a domain I am not in a mood or have enough money to convert it into a full scale website. So, I opted for one of the third-party hosting service. There are many but the one I opted for is Heroku because it is simple to understand and easy to use. You can directly integrate your github repo to the API and it will put a fresh deploy of your app. Yet the only shortcoming is that you can host atmost 3 apps and have a limited space given to you through a free account.
If you want one like that here are the steps you follow.
-
First install heroku using
npm> npm install -g heroku-cli -
Verify your install > heroku –version
-
Try logging in > heroku login
Enter your Heroku credentials.
Email: rajiv@example.com
Password (typing will be hidden):
Authentication successful.
-
Now clone your github repository into a directory. > git clone https://username.github.com/username/repo-name.git
-
Create a heroku app in it. > heroku create You will see the output something like this.
rajiv@rajiv-Inspiron-3537:~/CodingIsFun/sandl$ heroku create
Creating app... done, ⬢ cryptic-plateau-33460
https://cryptic-plateau-33460.herokuapp.com/ | https://git.heroku.com/cryptic-plateau-33460.git
-
Now a remote named
herokuis created and you can deploy from command-line directly by pushing your code onto this remote. > git push heroku master -
Yess! Now your app will be deployed. Check the debug report in the above command and the present command. You will find an URL. Thats where your app has been deployed. Open it! What are you waiting for!? (Thats what she said:P.)
-
Well, if you saw this, it means you screwed up. Otherwise you’d be immersed in testing your app. So, some unknown crap happened and your app is not working. It says, build failed.(Buzzer-Eeeeh! Thats what she said.). Anyways, whatever you have done its recoverable. Ofcourse only if you have the patience to make sense from logs. On your command line type this > heroku logs –tail
All the best! Happy Debugging!:shit:
Thanks for taking the pain to scroll till here. This is my first blog post and I am planning on writing more (Did someone say please no!?). You are welcome to suggest changes or for any queries!
Rajiv